How to create and save print profiles
Because of permissions in the Book Manager server, it is possible that Print Profiles are not visible to every account.
In this section of the guide, we’ll show you how to create your own print profiles
The guidance below concentrates on Stock Cards, but the same method can be applied to create print profiles for other documents generated by Book Manager, such as invoices.
- Connect to Book Manager via Remote Desktop or LogMeIn.
- In the Windows search box (bottom left corner of the screen ) type in Printers & Scanners.
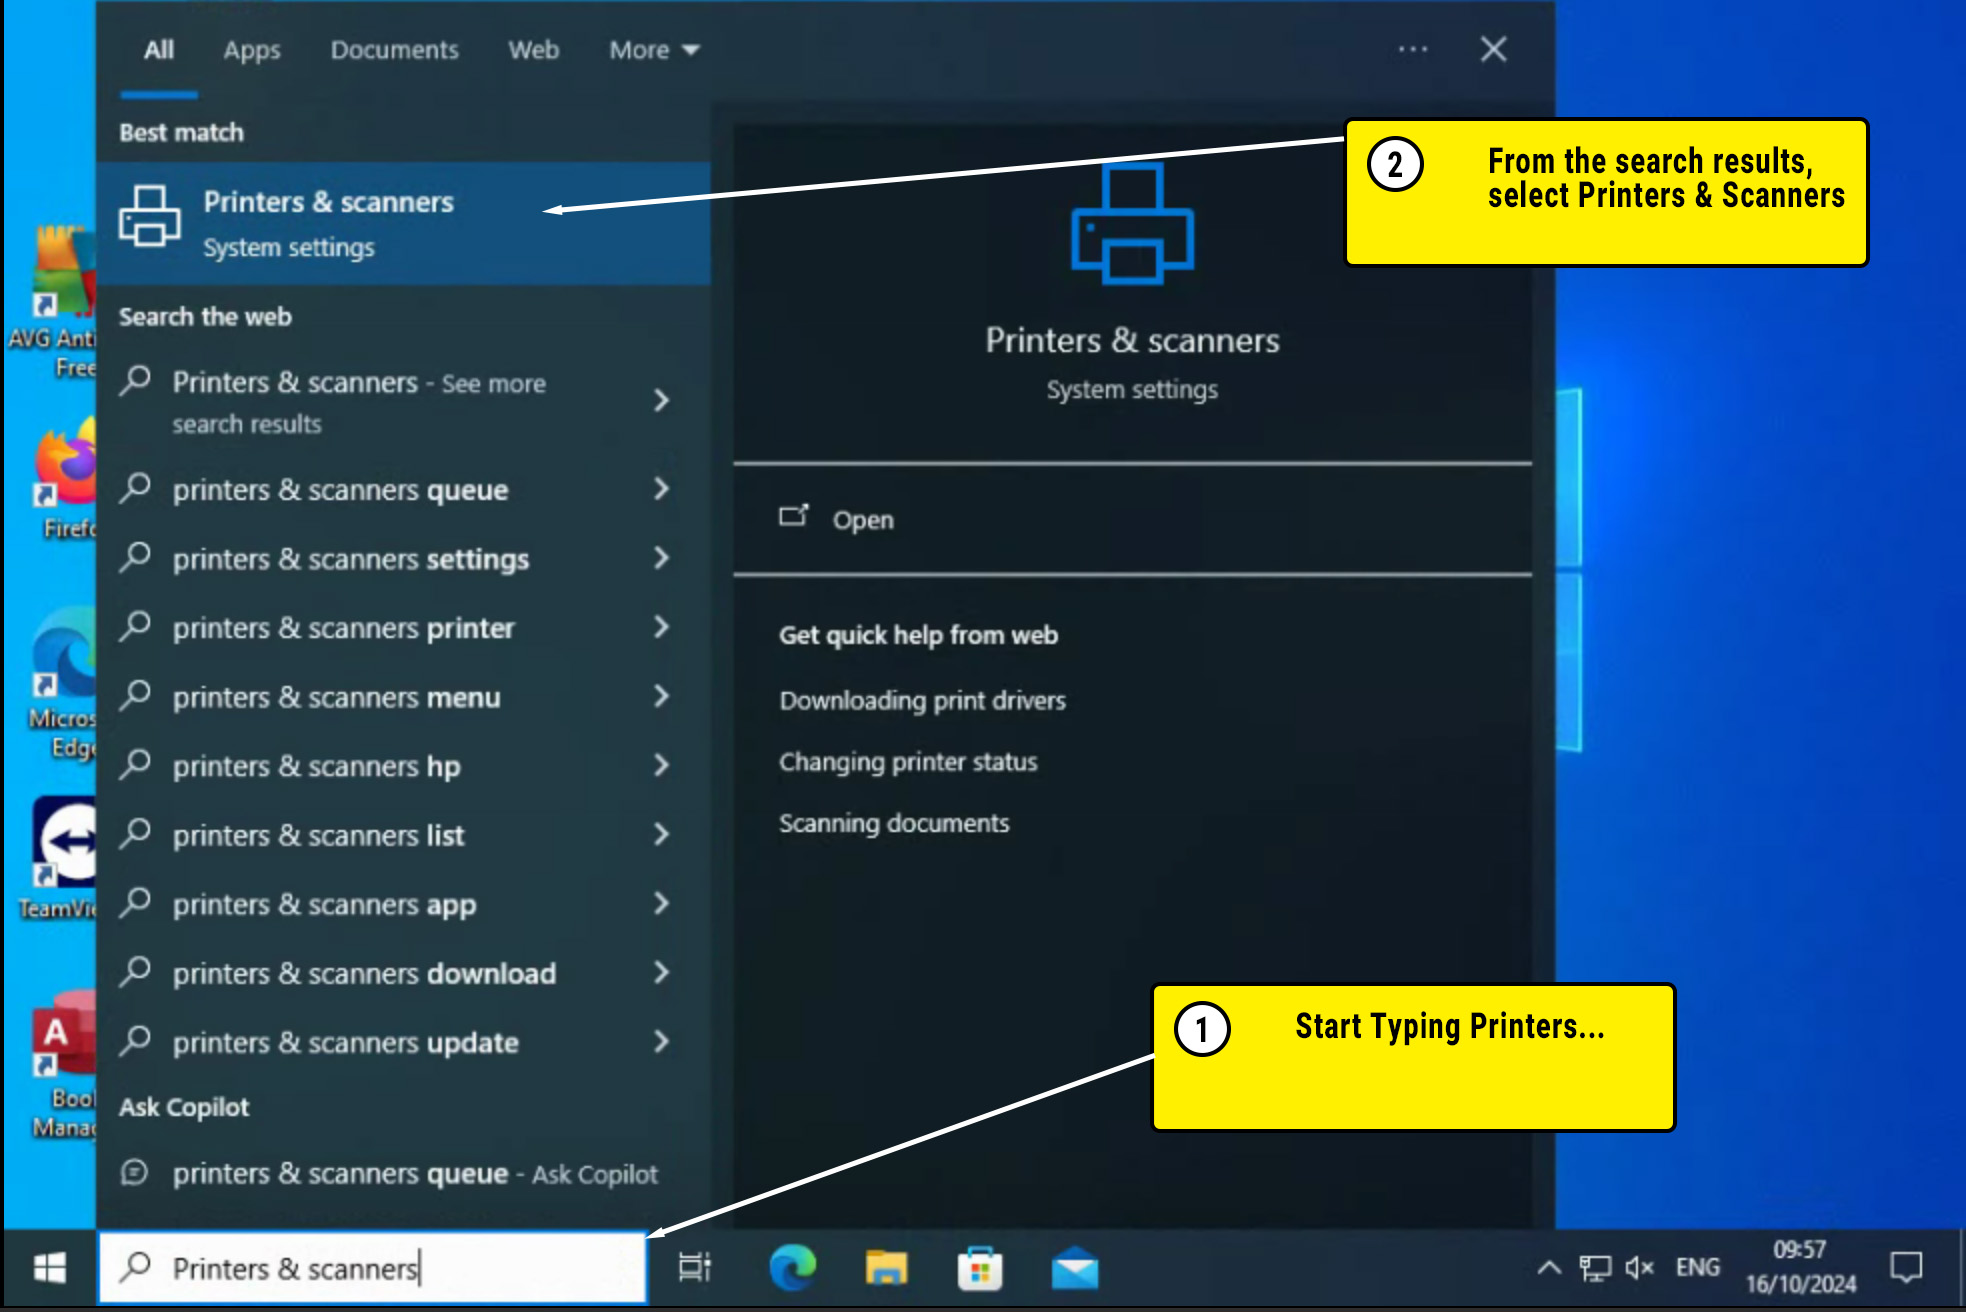
3. Click on Printers & Scanners System settings. This will show you a list of the printers installed in our network.

4. Options for that printer will show. Click Manage

5. From the menu window that appears, choose Printing preferences

6. Printing preferences will open the tab with the options available for the Kyocera printer.
Before we proceed to creating a print profile for the Stock Cards, click on the Advanced tab and ensure that the boxes next to Enable client profile is ticked on.

7. Now to create and save a print profile for stock cards, follow these steps:
- From the same Printing Preferences window, select Basic
- Choose settings exactly as in the picture:
- Print Size A6
- Page Size A6
- Source: Cassette 2
- Orientation: Landscape
- Media Type: Plain
- Destination: Printer default
- Once you’ve selected these settings, click Save As…

8. Save your profile
Give your profile a meaningful, easy to remember name (such as A6 Stock Card)
Optionally you could choose an icon to make it even easier to remember, and a description so it is easier to see what each profile is for in the future.

9. To apply your new profile and start printing stock cards, follow steps 1-6 in our Printing Stock Cards guide.
Happy printing !